Wallet Usage
UTXOS Wallet as a Service provides hosted wallets for Bitcoin, Cardano, and Spark (Bitcoin L2). Users authenticate through your app without installing browser extensions or managing private keys.
TLDR: Enable a multi-chain wallet with three lines of code.
import { Web3Wallet } from "@utxos/sdk";

const wallet = await Web3Wallet.enable({
  projectId: process.env.NEXT_PUBLIC_UTXOS_PROJECT_ID,
  networkId: 0, // 0 = testnet, 1 = mainnet
});
Supported Chains
| Chain | Network IDs | Key Features | Data Provider |
|---|---|---|---|
| Bitcoin | 0 (testnet), 1 (mainnet) | UTXO management, PSBT signing, transfers | Maestro |
| Cardano | 0 (preprod), 1 (mainnet) | Native assets, smart contracts, staking | Blockfrost |
| Spark | 0 (regtest), 1 (mainnet) | Bitcoin L2, fast transfers, low fees | Sparkscan |
Chain Guides
UTXO management, PSBT signing, and message signing for Bitcoin mainnet and testnet.
BitcoinNative assets, transaction building, and smart contract interaction on Cardano.
CardanoBitcoin Layer 2 for fast, low-cost transfers with Bitcoin security.
SparkPrerequisites
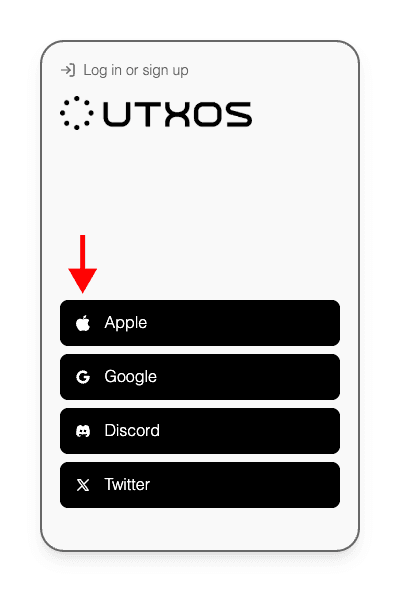
Create an Account
Sign up at utxos.dev/signin using a supported authentication provider.
Create a Project
From your dashboard, click Create New Project and enter your project name. Use http://localhost:3000 as the origin during development.

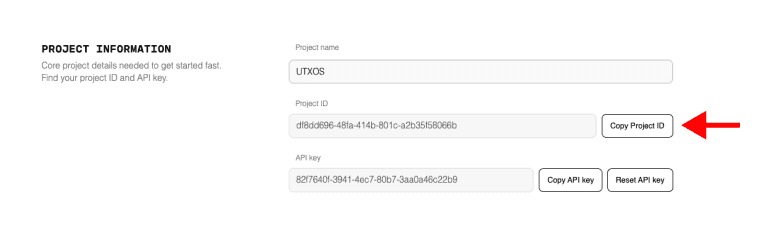
Copy Your Project ID
Navigate to project settings and copy your Project ID.
Configure Environment
Add your project ID to your environment file.
# .env
NEXT_PUBLIC_UTXOS_PROJECT_ID=your_project_id
NEXT_PUBLIC_NETWORK_ID=0  # 0 = testnet, 1 = mainnet
Quick Start
Install the SDK and initialize your wallet.
npm install @utxos/sdkimport { Web3Wallet } from "@utxos/sdk";
async function initWallet() {
const wallet = await Web3Wallet.enable({
projectId: process.env.NEXT_PUBLIC_UTXOS_PROJECT_ID,
networkId: parseInt(process.env.NEXT_PUBLIC_NETWORK_ID) || 0,
});
// Access chain-specific wallets
const bitcoin = wallet.bitcoin;
const cardano = wallet.cardano;
const spark = wallet.spark;
return wallet;
}Multi-Chain Example
Access all supported chains through a single wallet instance.
import { Web3Wallet } from "@utxos/sdk";

async function multiChainDemo() {
  const wallet = await Web3Wallet.enable({
    projectId: process.env.NEXT_PUBLIC_UTXOS_PROJECT_ID,
    networkId: 0,
  });

  // Get addresses from each chain
  const addresses = {
    bitcoin: (await wallet.bitcoin.getAddresses())[0]?.address,
    cardano: await wallet.cardano.getChangeAddress(),
    spark: wallet.spark.getAddress().address,
  };

  console.log("Addresses:", addresses);

  // Get balances from each chain
  const balances = {
    bitcoin: await wallet.bitcoin.getBalance(),
    cardano: await wallet.cardano.getBalance(),
    spark: await wallet.spark.getBalance(),
  };

  console.log("Bitcoin:", balances.bitcoin.total, "sats");
  console.log("Spark:", balances.spark.balance.toString(), "sats");

  return { addresses, balances };
}
Data Providers
Each chain requires a data provider for on-chain queries. UTXOS does not expose node APIs directly.
| Chain | Recommended Provider | Setup Guide |
|---|---|---|
| Bitcoin | Maestro | Bitcoin Setup |
| Cardano | Blockfrost | Cardano Setup |
| Spark | Sparkscan | Spark Setup |
Keep provider API keys server-side. Use API route proxies to prevent exposing credentials to clients.
Next Steps
- Bitcoin Wallet Guide - UTXO management and PSBT signing
- Cardano Wallet Guide - Native assets and smart contracts
- Spark Wallet Guide - Bitcoin L2 transfers