Third-Party OAuth2 Authentication Support
At times, your web application might already utilize OAuth2 authentication to create an authentication session. In this instance, by sharing the users refresh token with UTXOS we can skip the authorization step of the OAuth2 flow. This guide will display how you can use an existing OAuth2 session in your application, to seemlessly have user’s sign in to a UTxOs non-custodial wallet.
This feature is available on the Scale plan.
Each OAuth2 provider has a slightly different configuration and requirements, please note the guide for your preferred OAuth2 provider.
It’s expected you have already created a Client for Web Application in the Google Auth Platform.
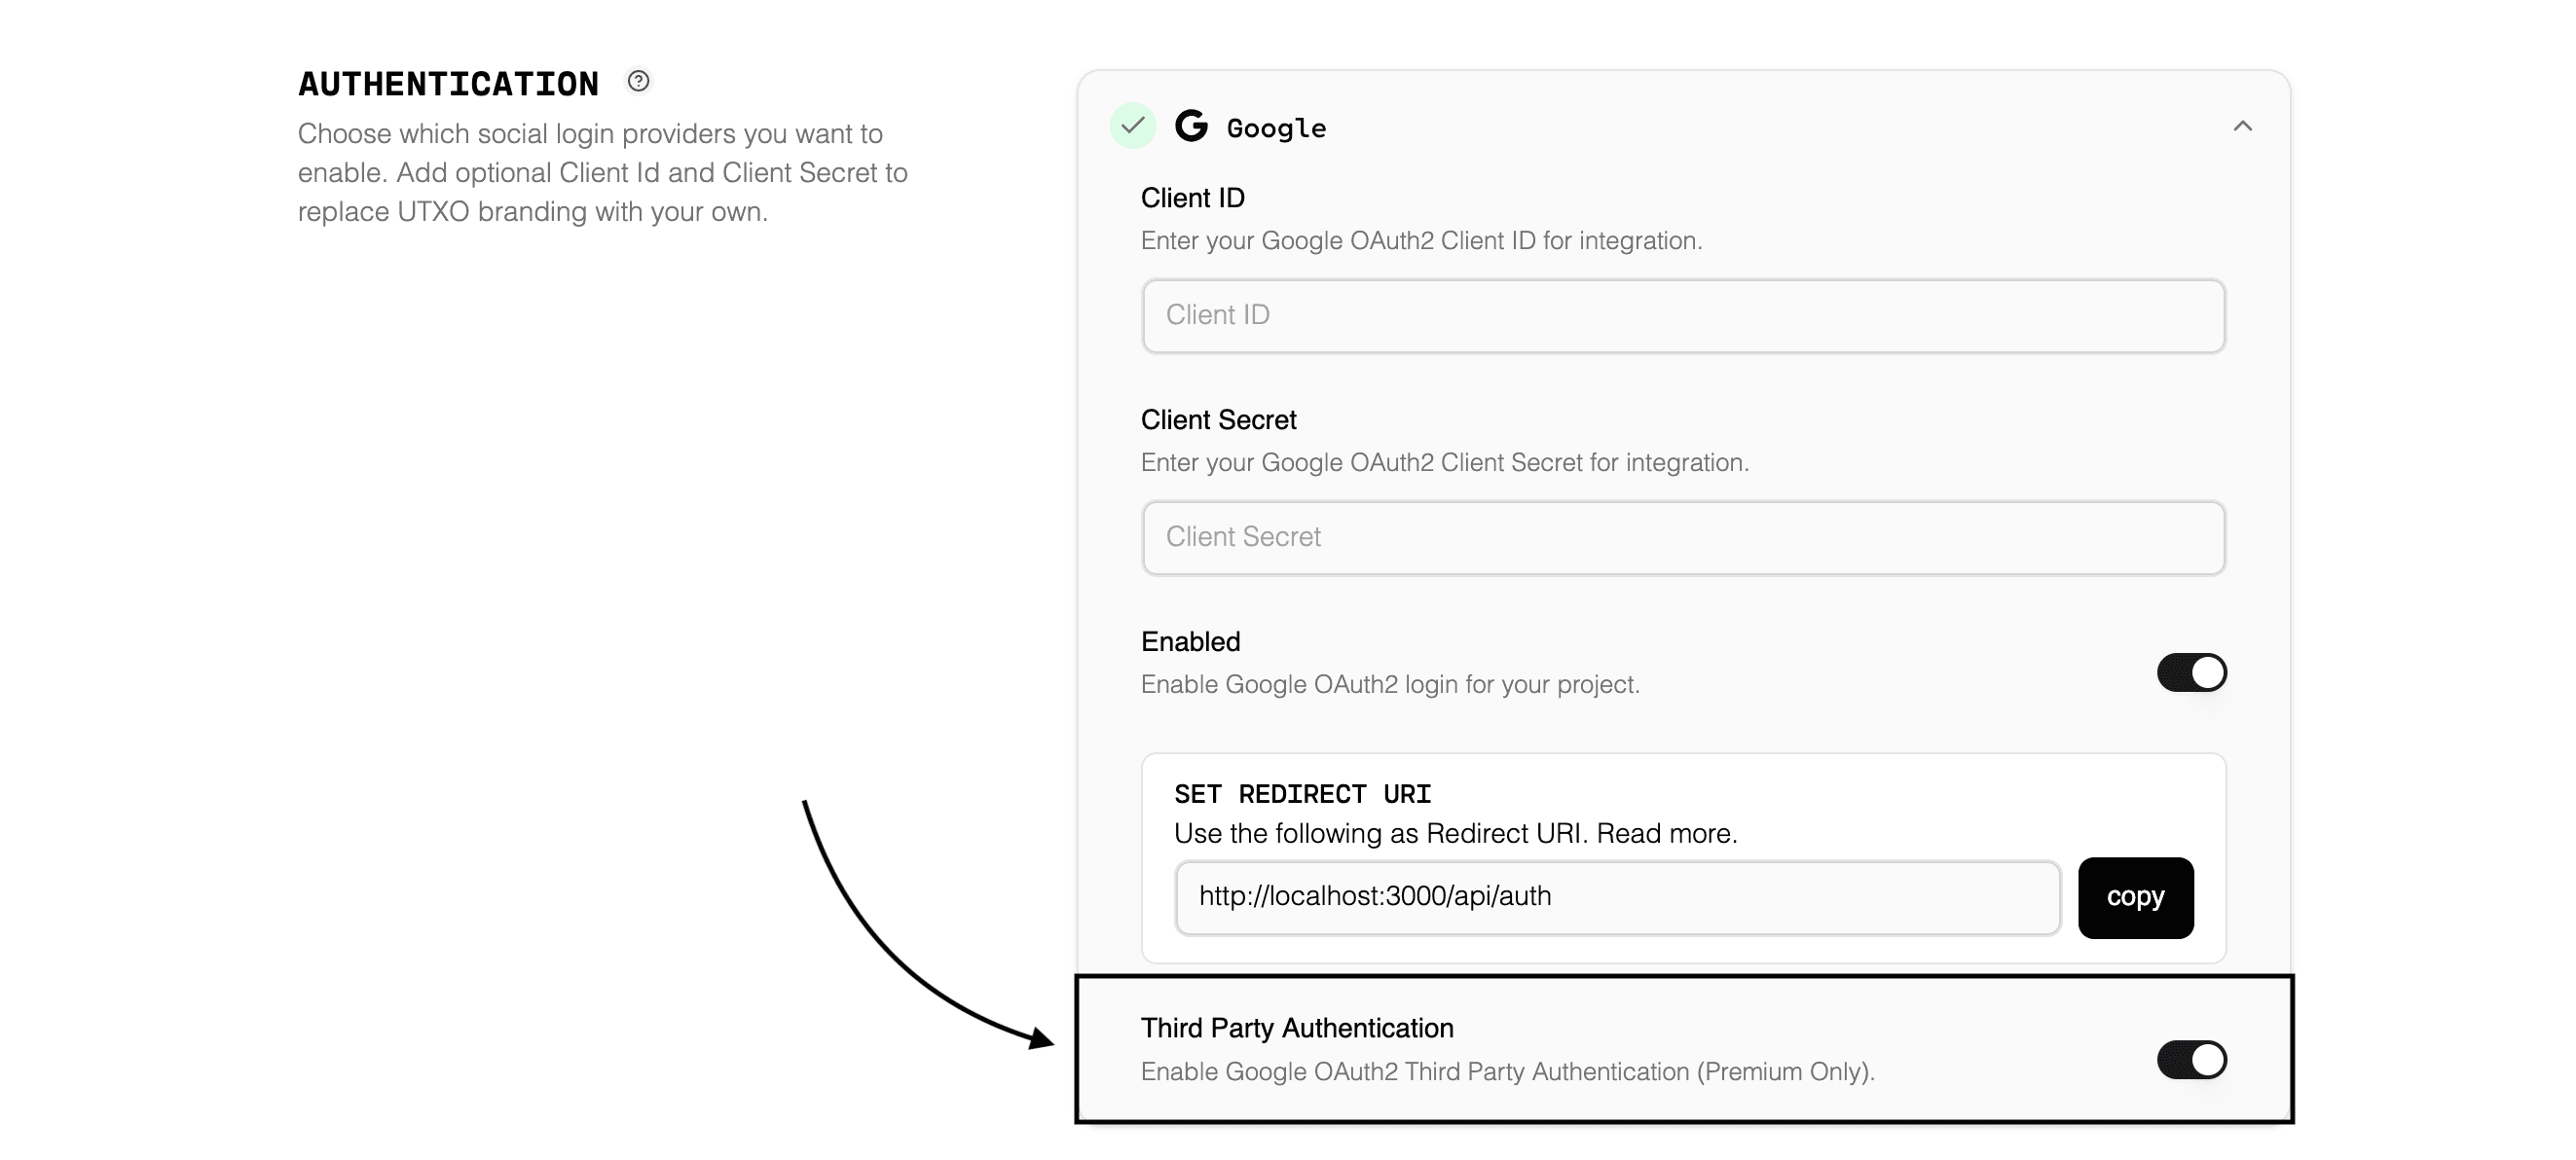
In the UTXOS project dashboard enable Third Party Authentication for your Google Provider.

Please note, Google OAuth2 authentication is special, UTXOS does not require you to input the Client ID & Client Secret in order to use Third Party Authentication. This is because Google does not require authentication for gaining an access token through a refresh token.
Your application must complete the OAuth2 flow and obtain the access token & refresh token for the user. This requires some additional configuration in the authorization url.
Make sure you obtain the scope to get the email and profile of the Google User, UTXOS non-custodial wallet authentication requires these scopes to build our profiles.
const googleSearchParams = new URLSearchParams({
    client_id: process.env.YOUR_CLIENT_ID,
    redirect_uri: process.env.YOUR_REDIRECT_URL,
    response_type: "code",
    access_type: "offline", // Must include access_type: offline to obtain the refresh_token
    prompt: "consent", // must include prompt: consent to obtain the refresh_token
    // Include Email & Profile scopes or else UTXOS authentication will fail.
    scope: "https://www.googleapis.com/auth/userinfo.email https://www.googleapis.com/auth/userinfo.profile",
});

// This URL is where you will redirect the user during OAuth2 authorization.
const googleAuthorizeUrl = "https://accounts.google.com/o/oauth2/v2/auth?" + googleSearchParams.toString();
After completing the PKCE flow, you will obtain the refresh token and store that somewhere.
Now when looking to obtain the UTXOS wallet in order to sign data or transactions, use the following fields.
const wallet = await Web3Wallet.enable({
    projectId: process.env.UTXOS_PROJECT_ID,
    networkId: 0,
    // by passing directTo of google alongside a valid refreshToken, UTXOS backend knows to automatically authenticate the user.
    directTo: "google",
    refreshToken: refresh_token,
});

console.log(await wallet.getChangeAddress());
Discord
It’s expected you have already created an OAuth2 Application in the Discord Developer Portal.
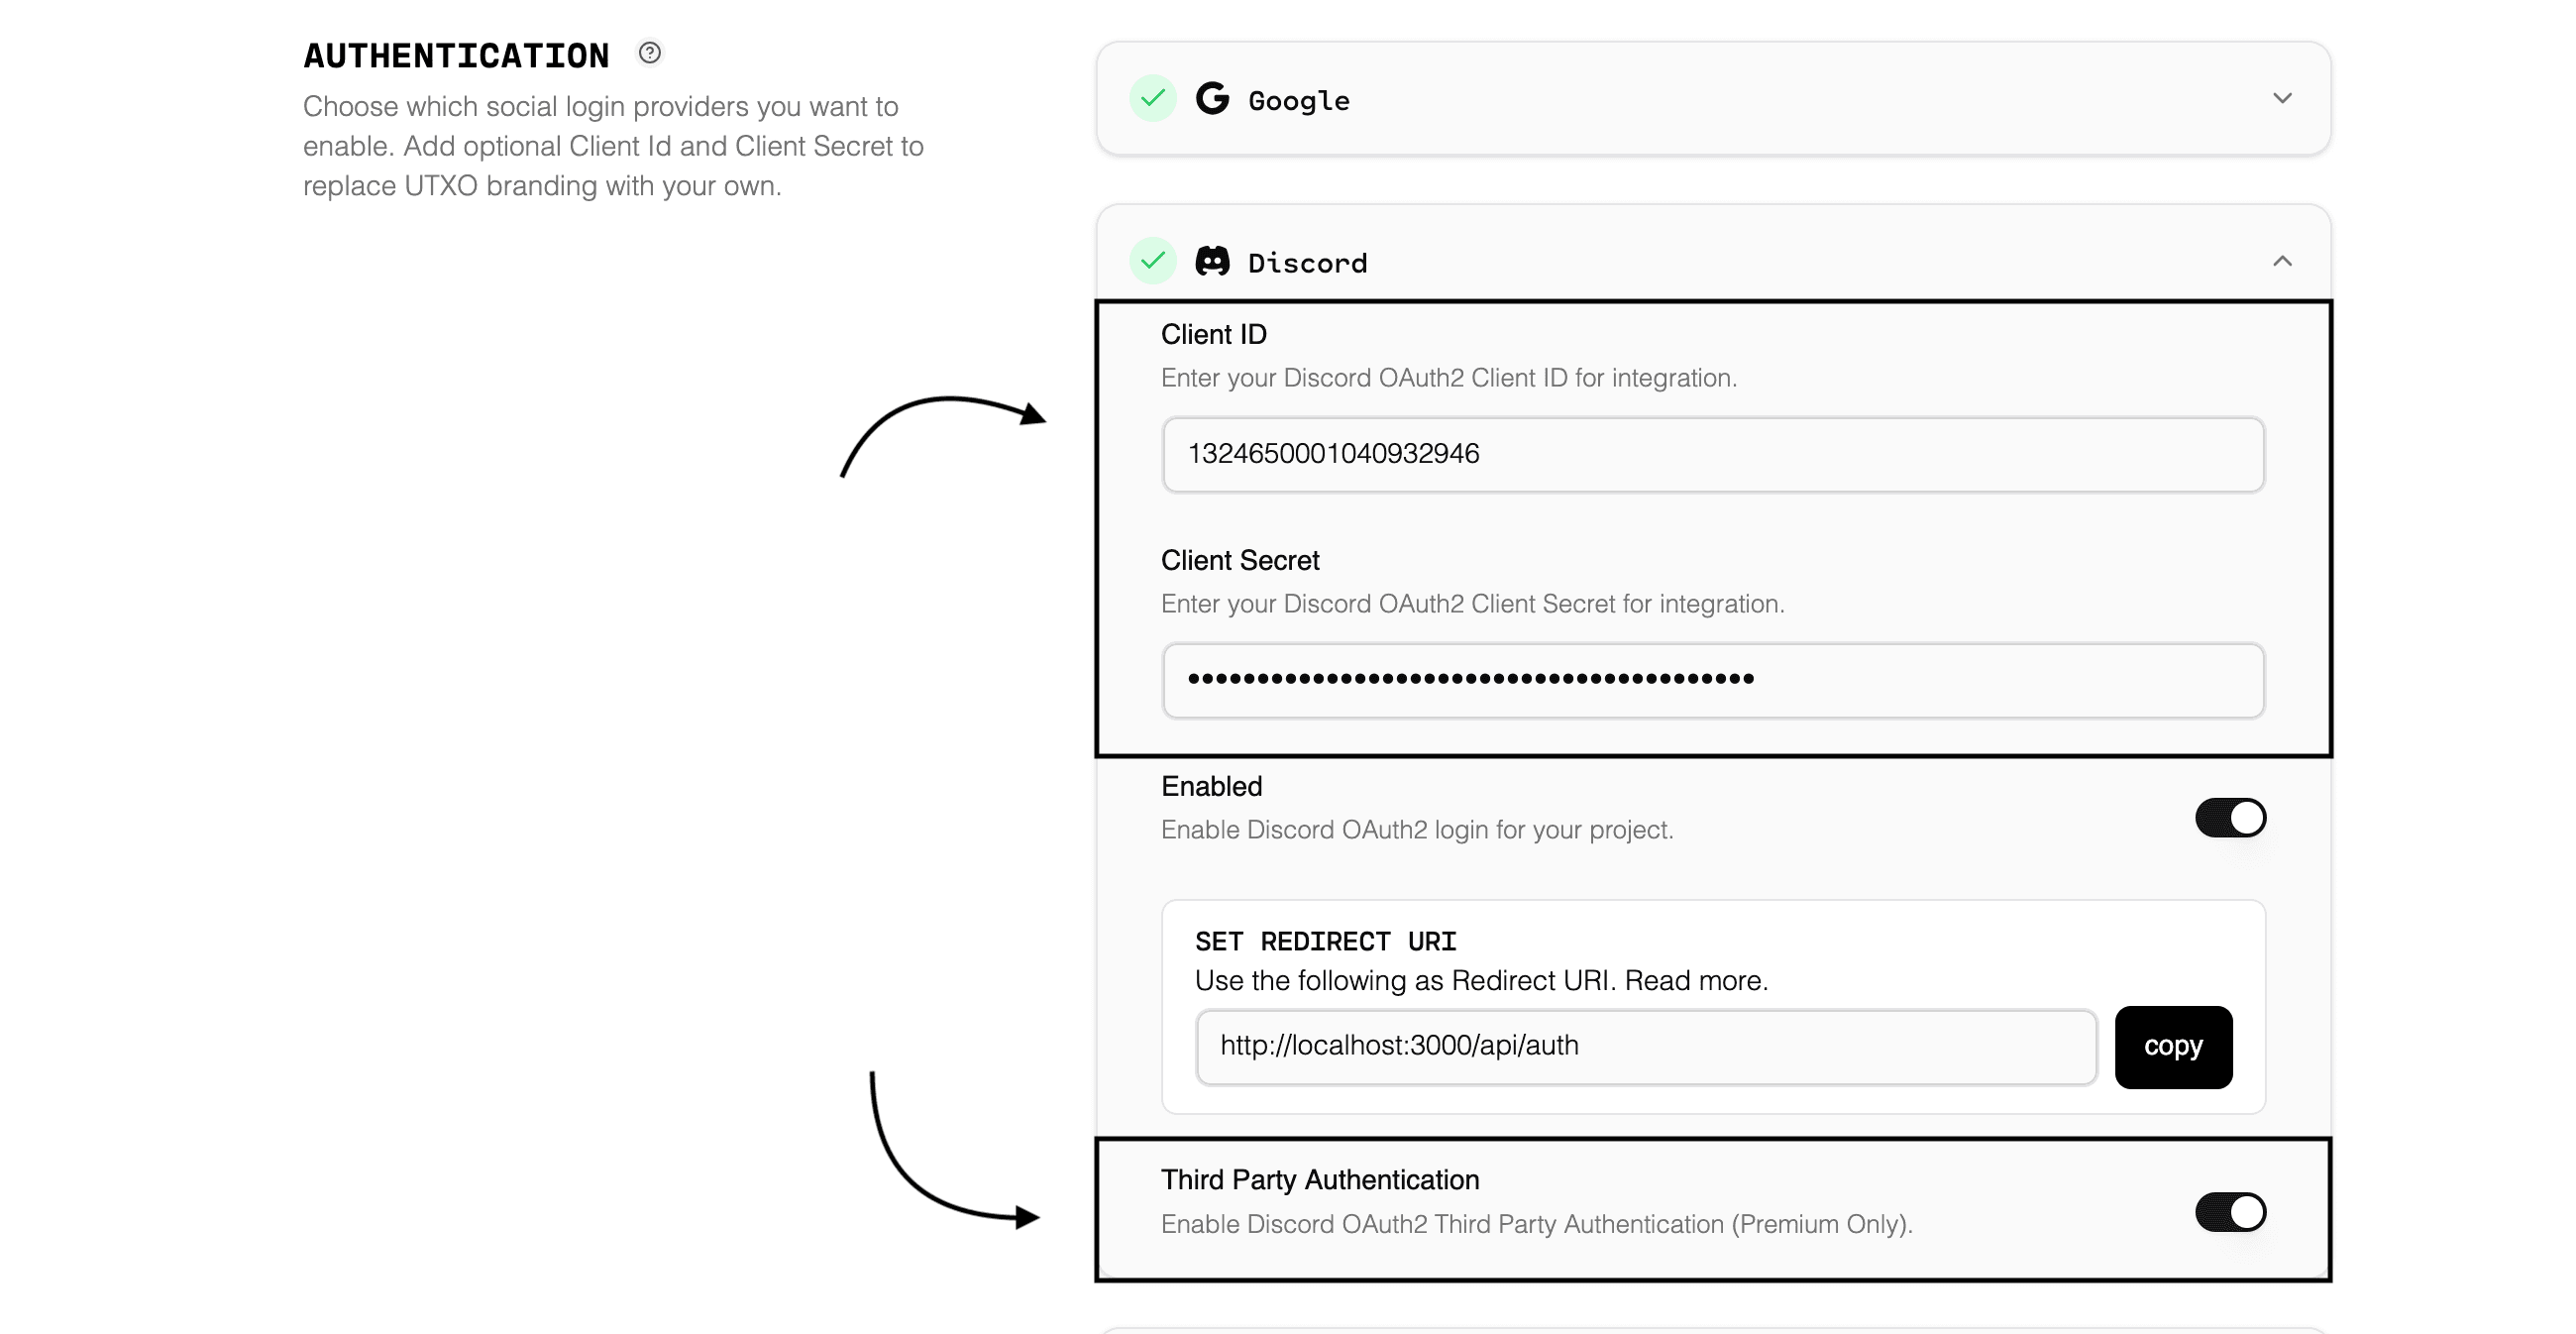
In the UTXOS project dashboard enable Third Party Authentication for your Discord Provider, and input your OAuth2 integrations Client and Secret.

Make sure you obtain the scope to get the email and identity of the Discord User, UTXOS non-custodial wallet authentication requires these scopes to build our profiles.
const discordSearchParams = new URLSearchParams({
    client_id: process.env.DISCORD_CLIENT!,
    response_type: "code",
    redirect_uri: process.env.REDIRECT_URL!,
    // UTXOS requires at least the identity and email permissions for our authentication system.
    scope: "identify email",
});

// This url is where a user will navigate to to authorize your OAuth2 application.
const discordAuthorizeUrl = "https://discord.com/oauth2/authorize?" + discordSearchParams.toString();
After completing the PKCE flow, you will obtain the refresh token and store that somewhere.
Now when looking to obtain the UTXOS wallet in order to sign data or transactions, use the following fields.
const wallet = await Web3Wallet.enable({
    projectId: process.env.UTXOS_PROJECT_ID,
    networkId: 0,
    // by passing directTo of discord alongside a valid refreshToken, UTXOS backend knows to automatically authenticate the user.
    directTo: "discord",
    refreshToken: refresh_token,
});

console.log(await wallet.getChangeAddress());